Welcome to my blog!

Hi!

I invite you to please visit some of my blog posts below and have a look at the projects that I've created with the wonderful Stampin' Up! product range.

If you would like a current Stampin' Up! catalogue please email me!

Sunday, December 29, 2013

Stampin' Up! Australia - Stampin' Up! Petal Parade Sale-a-bration 2014

Hi 

Here's a bit of an unconventional Valentine's Day card....but appropriate if you give cards to your Mum or your daughter for the occasion. 

I was inspired by the image at Case Study this week plus the sketch from Pals Paper Arts has been on my mind ever since I saw it! 

I have used a BRAND NEW stamp set that will be available during Sale-a-bration from 28 January to  31 March. The stamp set is Petal Parade and you can get it for FREE with any order of $90.

If you would like me to send you a free Sale-a-bration catalogue, just email me and I will pop one in the mail. It's a great time of year to score new and free Stampin' Up! product!. 


Notes/confessions on this card...

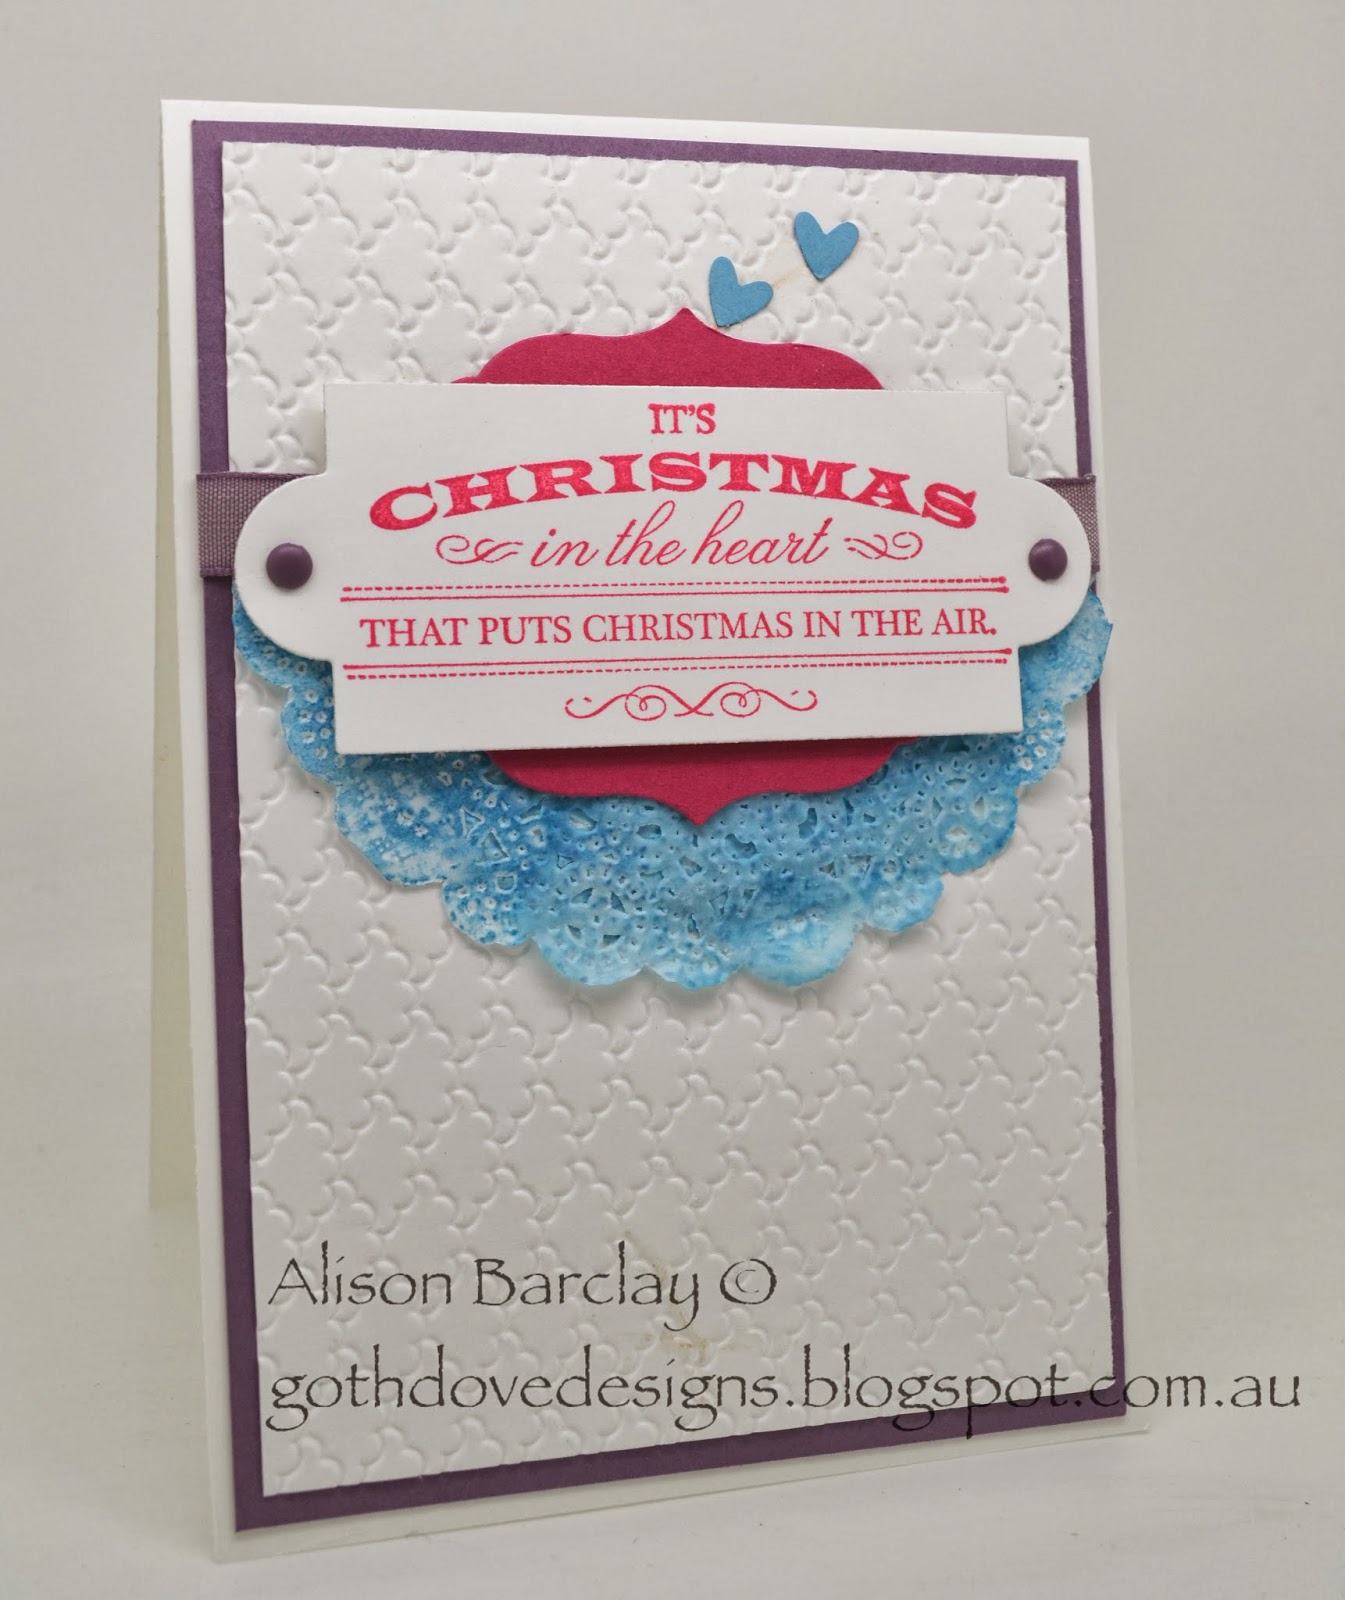
I initially wanted to make this card more 'folk art' like the image, but my CAS style just wouldn't go there.....I used the little flower flourish from 'Best of Shelli' to give it some folk edge and the scallop of the heart framelit also echoes the doilies in the background. My card was also only meant to be a white panel on a white base with my masked feature, but my masked vertical feature was slightly crooked so, to 'fool' the eye, I cropped it down a bit and mounted it onto a Real Red panel as a slanted piece....it's all the rage right now so why not!!? :)


Cheers
Alison xx

Stamps - Petal Parade (SAB 2014), Best of Shelli
Ink - Real Red, Daffodil Delight, Midnight Muse, Gumball Green
Cardstock - Whisper White, Real Red
Accessories - none
Tools - Big Shot, Expressions Thinlits (love sentiment), Hearts a Flutter Framelits, post-it notes (for my mask), SNAIL, Two Way glue pen


Sunday, December 22, 2013

Stampin' Up! Australia - Papillon Potpourri - Butterfly Card

Hi

A friend at work asked me to make them a card based on this one by Claudia from Ink Paper Love. Claudia's card is really cool....it had different coloured butterflies flying out of a jar and she had created some cool swirly stitching on her card too. My friend at work wanted blue tones to the card so I set about trying to recreate the look and feel of Claudia's original (without having to use any sewing since I'm terrible at that!! :) ). 

Claudia was kind enough to give her blessing for me to publish this CASE'd card to share with you. :)


I used the Hearts a Flutter framelits to make my "jar" out of acetate (window sheet). I used a corner rounder punch to round the corners of the shape and snipped off the end part to make the top of the jar. 


I then just used a Basic Black Marker to draw on my jar. 


The colours of the butterflies are Marina Mist, Bashful Blue, Midnight Muse and Baja Breeze. 


My work colleague loved the card! YAY!


Cheers
Alison xx

Materials used:
Stamps - Papillon Potpourri, Curly Cute
Ink - Midnight Muse, Bashful Blue, Marina Mist, Basic Black Marker (for jar)
Cardstock - Whisper White, Bashful Blue, Baja Breeze, Midnight Muse, Marina Mist, 
Accessories - Pearls, Window Sheet (for jar)
Tools - Big Shot, Butterfly Embosslits, Bitty Butterfly punch, Hearts A Flutter Framelits, Corner Rounder Punch, Glue Dots, Paper Piercer, Piercing Mat

Wednesday, December 18, 2013

Stampin' Up! Australia - Festive Flurry Ornament

Hi

Here's some photos of the ornament that I made for my son's kindy teachers.....I made three of them as end-of-year thank you gifts.


...and here's the reverse....stamped also! :)


You can still get all the supplies to make one of these from my online store. It won't arrive in time for Christmas now, but at least you will be able to make a head start on your ornaments & gifts for next year!! :)

Cheers & Merry Christmas!
Love
Alison xx

Materials used:
Stamps - Festive Flurry (available as a bundle with the Festive Flurry Framelits), Delightful Dozen (for sentiment on reverse of ornament)
Ink - Cherry Cobbler, Lucky Limeade (retired, but Old Olive would be fine also), Early Espresso
Cardstock - Whisper White, Silver Glimmer Paper
Accessories - Silver 1/8 inch ribbon, Frosted Finishes Embellishments
Tools - Big Shot, Festive Flurry Framelits, Labels Collection Framelits, 2 1/2 inch circle punch, Stampin' Dimensionals, Silicone Mat (for use with glue gun), 7/8 inch scallop circle punch (retired, but the 3/4 inch circle would do fine), Glue Dots

Monday, December 16, 2013

Stampin' Up! Australia - Christmas Pinwheel Card

Dear Everyone

I saw this pinwheel card & video on Dawn Olchefske's blog a while ago and when I was creating some Christmas cards this year I thought of doing a Christmas-themed pinwheel card.

I contacted Dawn to see if she would give her blessing for me to share this CASE'd card and she was gracious & kind enough to give it! :)


I used the Season of Style Paper Stack DSP for my pinwheel and back of the window. 

You can buy supplies for this card at my online store. Note, the pinwheel sizzlit is retired, but you can make a pinwheel with a 2.5in x 2.5 inch piece of square card and some scissors - just make diagonal cuts from the corner towards, but not into, the centre of the card. Curl the corners in, pierce with your piercing tool and fasten with a brad! :)

Hope you like my card!

Cheers
Alison 

Materials used:
Stamp - Greetings of the Season
Ink - Cherry Cobbler
Cardstock - Cherry Cobbler, Crumb Cake, Season of Style Paper Stack
Accessories - misc brad
Tools - Big Shot, Stylish Stripes Embossing Folder (Holiday Catalogue), Pinwheel Sizzlit (retired), Paper Piercing Tool, Piercing Mat, Word Window Punch, Multipurpose Liquid Glue, Dimensionals, 5c pieces (for spinning mechanism). 

Tuesday, December 10, 2013

Stampin' Up! Australia - Clearance Rack

Hi

The Stampin' Up! clearance rack blitz starts today Tuesday 10 December....there is no end date on the clearance so it is only while stocks last.

I also have FREE SHIPPING on all orders over $100 until midnight 15 December so get your orders to me pronto if you want to take advantage of the clearance sale + free shipping from me.

Click HERE to browse the clearance rack, but please remember that I am only offering free shipping on orders that are phoned or emailed through to me, as I am unable to reduce the shipping price for online orders.

Cheers
Alison xxx

Saturday, December 7, 2013

Stampin' Up! Australia - Best of Birthdays - Christmas Card

Hi

Catherine Pooler shared one of her very 'clean & simple' cards over at StampNation - it was way cool so I thought I would have a go at the same layout and idea.

The only 'present' stamp that I have is the one from 'Best of Birthdays' so I did some semi-random stamping on a piece of Whisper White.....I think I need to work on my 'random stamping'...there are too many weird gaps....I'm sure there's a video tutorial somewhere with some tips.

Anyway....here are the cards...


I like the placement of the presents on the card above...but I'm not too sure about the colour choices....I probably should have omitted the snowflakes too. 


I like the colour choices on my card above, but there was a gaping white hole on the main panel which I tried to 'fix' with a red candy dot....not sure that I should have done that. :(

Oh well, it was good to try something different. :)

By the way....I'm on Facebook so 'like me'!


Cheers
Alison xx

Materials used:
Stamps - Best of Birthdays, Curly Cute, Greetings of the Season
Ink - Stazon
Cardstock - Crumb Cake, Whisper White
Accessories - Candy Dots Brights
Tools - Stampin' Trimmer, Watercolour pencils (retired)


Thursday, December 5, 2013

Stampin' Up! Australia - Doctor Who Christmas Card - Festive Tardis

Hi

This isn't a stamped card at all, but one I put together in "My Digital Studio" by resizing an insanely cool image of the Tardis decorated for Christmas. 

I have a few Whovian friends and I was looking for a suitably geeky Christmas card, but couldn't find one, so I decided to make my own. :)


Hope you like it! - if you would like the link to the image, just email me!

Cheers
Alison xx

Materials used:
Digital image
My Digital Studio
Whisper White & Pacific Point card stock
SNAIL adhesive, Stampin' Trimmer

Saturday, November 30, 2013

Stampin' Up! Australia - Expressions Thinlit Dies - Merry Christmas Card

Hi

This next card came about as a result of my inability to throw anything away....I've always been a bit of a hoarder but it sometimes pays off....as this next card will demonstrate.

Last month, I did some Christmas Treat Bags with my card making class using the Real Red Goodie Gear Simply Created Kit. The kit comes with cool adhesive red & white strips to decorate the tag (see photo below). Stampin' Up! kindly give you way more than you need in each kit so at the end of the class I collected all the off-cuts knowing that they would come in handy for a card that was yet-to-be-conceived! :)


The challenge at Less is More this week is to use 'sparkle' and the challenge at Just Add Ink is to use stars. These two ideas gave me the inspiration that I needed to decorate my card.  I cut some gorgeous Silver Glimmer Paper with my new Expressions Thinlit Dies for my 'sparkle' , then I added some stars using my Merry Minis Punch Pack


Hope you like my card!

Cheers
Alison
xx

Materials used:
Stamps - none
Ink - none!
Cardstock - Whisper White, Silver Glimmer Paper
Accessories - Adhesive Sheets from the Real Red Goodie Gear Simply Created Kit
Tools - Big Shot, Expressions Thinlit Dies, Two Way Glue Pen, Merry Minis Punch Pack, Wax Paper (to help get the glimmer paper out of the thinlit die). 


Thursday, November 28, 2013

Stampin' Up! Australia - Stampin' Up! Expressions Thinlit Dies

Hi

Here's a little 10cm x 10cm square card that would be great for a Valentine or just a little cute note to leave for your special someone. :)

I made this for the Dynamic Duos challenge this week which is a cool "Triple Threat" colour challenge of Raspberry Ripple, Pear Pizzazz and Blushing Bride. 

I took this opportunity to break out my Expressions Thinlit Dies and have a play with them. I thought the 'love' script would look cool over a big heart shape. I took the advice of a few US demos who recommend the use of wax paper when using the thinlit dies.....put some wax paper between the die and your card stock and the card stock will come out of the die perfectly and it won't rip. :)

For my Australian followers, Coles Supermarket sell "Waxed Lunch Paper" in their baking paper/aluminium foil section. 

Here's my card....


Cheers
Alison xx

Materials used:
Stamps - none!
Ink - none!
Cardstock - Very Vanilla, Raspberry Ripple, Blushing Bride, Pear Pizzazz DSP
Tools - Big Shot, Expressions Thinlit Dies, Two Way Glue Pen, Stampin' Dimensionals, Wax Paper, Heart to Heart Punch (retired), Large Heart Die (non-SU, but you could use the SU Heart Framelits for this card). 

Monday, November 25, 2013

Stampin' Up! Australia - Less is More #147 - Stampin' Up! Bird Punch Christmas Card

Hi

I had seen earlier today that the challenge this week at Less Is More was to use a bird on your card. This afternoon, my little boys were playing with their box of discarded punched pieces and they were making little collages on cardboard....it was all very cute. I found this little bird that I think was punched from a random piece of card or backing of something...it's not quite kraft or Crumb Cake...it's more like thin cardboard but it has a nice colour & feel, so I picked it up from where they were playing and put it on my craft table for inspiration. 

I had already made a couple of Christmas Cards this evening and I found some vanilla card stock that had already been cut into 3 rectangles (left over from a card class kit). I put my little cardboard bird on one of them and the card just came into being from there....


If you like this card and are inspired by it to make your own, then support my business & creativity and purchase your craft supplies at my online store. :)

Cheers
Alison 

Materials used:
Stamp - Greetings of the Season
Ink - Baked Brown Sugar
Cardstock - Very Vanilla, Pear Pizzazz, Crumb Cake (for bird...unless you have some random cardboard for your bird).
Accessories - Pearls
Tools - Stampin' Trimmer, Bird Builder Punch, Stampin' Dimensionals, Two-way Glue Pen.

Sunday, November 24, 2013

Stampin' Up! Australia - You Are My Sunshine Stamp

Hi

Recently on StampNation, there was a challenge called "Outside My Window"....well I live in Brisbane, Australia and at the moment there is crazy amounts of daily thunderstorm activity and last night there was even a tornado in the next town over. Thunderstorms are commonplace in tropical Brisbane, but tornados are not. 

This photo wasn't exactly "outside my window" but it was taken by a storm-watcher not far from my place last week....look at that amazing storm cell structure!!!


So I set about trying to create a card inspired by this photo.

The other day, I caught a post from CASE Study and realised that I had never entered one of their challenges.....mainly due to a lack of confidence as their CASE Study muses are always SO talented. This week's challenge was no exception, but I took the FB post as a bit of a "sign", got up the courage, and thought about how this card below 'spoke' to me....well, it was the chevrons of course...but also the partially obscured flower features. It is very modern & cool. 


...and so my card was born....the fluffy white clouds against a sunshine-y sky.....with the chevron and  flower references....and a sentiment that promises love despite whatever struggles may appear before us. :)

Hope you all like it! Please comment if you do. :)

Materials used:
Stamp - Sunshine (single clear stamp), Positively Chevrons
Ink - Basic Grey, Stazon
Cardstock - Whisper White, Basic Grey, Summer Starfruit, Silver Glimmer Paper (on button). 
Accessories - Summer Starfruit button & die-cut doily (from a kit that's now retired)
Tools - Big Shot, Cloudy Day Embossing Folder, Edgelits Adorning Accents, Glue Dots, Paper Snips, Stampin' Trimmer, Boho Blossoms Punch, SNAIL. 

Friday, November 22, 2013

Stampin' Up! Australia - Stampin' Up! Eastern Elegance Christmas Card

Hello!

I made this card for the Dynamic Duos challenge this week but I'm too late blogging it to enter it into the challenge...oh well. I've still published it in time for the Mojo Monday Challenge #320 so all is not lost! :)

The talented Catherine Pooler shared a card recently on StampNation where she made an aperture with a die cut and layered an interesting glimmer texture behind it....it looked really cool and when I made yesterday's cards, I had a groovy square piece of card stock with a lovely snowflake shape negative. I decided I would use it on this card. 


Hope you are on track with all your Christmas card making & projects. Give me a yell if you need any supplies....I'd be happy to help you put your order together. :)

Cheers
Alison xx

Materials used:
Stamps - Happy Day, Joyous Celebrations (retired)
Ink - Basic Black, Smoky Slate, Illuminate ink
Cardstock - Whisper White, Smoky Slate, Eastern Elegance DSP, Silver Glimmer Paper
Accessories - Glimmer Brad, 1/8" Basic Black Taffeta ribbon
Tools - Stampin' Trimmer, Big Shot, Snow Flurry Bigz Die, Corner Rounder Punch

Thursday, November 21, 2013

Stampin' Up! Australia - Stampin' Up! Christmas Card

Hi!

Just a quick blog post from me...here's a Christmas card based on a sketch by Catherine Pooler - it's a fun clean & simple design and one that can be used with an array of Designer Series Paper.

Mine is from my scraps pile....I think I got it for free with a magazine years ago...I just liked the purple-ness of it. :)


Cheers
Alison x

Materials used:
Stamps - Snow Swirled, Greetings of the Season
Ink - Versamark
Cardstock - Whisper White, Silver Glimmer Paper, misc Christmas patterned paper
Accessories - retired SU rhinestone brads
Tools - Stampin' Trimmer, Heat Tool, Embossing Buddy, Silver Embossing Powder, Multipurpose Liquid Glue, Paper Piercer, Envelope Punch Board (to round corners) , Big Shot, Snow Flurry Bigz Die (retired).

Sunday, November 17, 2013

Stampin' Up! Australia - Color Coach Card #25 - Stampin' Up! Heart of Christmas

Perfect Plum Card #3


Hi!

Two posts in one day!?...yes, I've been busy....and there still may be a third yet!...stay tuned....


I made this card for my Color Coach Challenge. The Color Coach card for Perfect Plum suggests Perfect Plum, Marina Mist and Rose Red as a colour combination....when I first saw this I thought maybe a baby card?....or a soft Mother's Day card??....but Pinterest seems to be all the rage with non-traditional Christmas Cards right now so I thought I would throw the festive spirit at it instead. :)

This fabulous sketch at CAS(E) this Sketch provided good inspiration!


The stamp set that I've used is sadly retired, but Joy to the World from the current Holiday catalogue  (Wood 131796 $37.95 AUD or  Clear 131799 $29.95 AUD) would be a perfect substitute! 


If you like this card and are inspired by it to make your own, then support my business & creativity and purchase your craft supplies at my online store. :)

Cheers!
Alison 


Materials used:
Stamp - Heart of Christmas (Retired)
Ink - Rose Red, Marina Mist
Cardstock - Whisper White, Perfect Plum, Rose Red, Marina Mist
Accessories - Perfect Plum brads (or Candy Dots), Tea Lace Paper Doily, Perfect Plum Taffeta ribbon
Tools - Big Shot, Fancy Fan Textured Impressions Embossing Folder, Labels Collection Framelits, Apothecary Accents Framelits, Stampin' Sponges, SNAIL, Stampin' Dimensionals, Two Way Glue Pen, Owl Builder Punch (for hearts), Multipurpose Liquid Glue


Stampin' Up! Australia - Color Coach Card #24 - Stampin' Up! Snow Swirled

Perfect Plum Card #2

Hi!

I have jumped around the strict Color Coach order on my self-imposed Color Coach Blog Challenge so if you are looking for the Perfect Plum Card #1 it is here. This card uses Perfect Plum & Elegant Eggplant. The tree was stamped in Perfect Plum first and then rolled in Elegant Eggplant around the edges.

A colleague at work bought my Artichoke Christmas Card and asked if I could make another one in purple...so I CASE'd myself and here it is...


If you like this card and are inspired by it to make your own, then support my business & creativity and purchase your craft supplies at my online store. The 'tree' stamp on my card is now retired but the Special Seasons stamp set would be lovely I think as a substitute!

Thanks for visiting!

Cheers
Alison xx

Materials used
Stamp - Snow Swirled
Ink - Perfect Plum & Elegant Eggplant
Cardstock - Elegant Eggplant, Perfect Plum DSP, Whisper White, Silver Glimmer Paper
Accessories - Whisper White Organza Ribbon, White Bakers Twine, Paper Doily
Tools - Stampin' Trimmer, SNAIL, Big Shot, Stylish Stripes Textured Impressions Embossing Folder,  Merry Minis Punch Pack (star punch), Glue Dots, 1/2 circle punch, Crop-a-dile

Saturday, November 16, 2013

Stampin' Up! Australia - Pink Christmas Card

Hi

I liked my pink birthday card so much that I made this Christmas Card too. 

It's a non-traditional Christmas card that was inspired by THE most gorgeous card that Catherine Pooler shared at StampNation. She used a lovely pink festive DSP and it really looked amazing.  

This isn't entirely Stampin' Up! but we all have some stuff laying about from pre-SU days don't we!!?


Hope you like it. :)

Cheers
Alison xx


Friday, November 15, 2013

Stampin' Up! Australia - My Digital Studio - Amped Up Ampersands

Hi

I was having a bit of fun with My Digital Studio today and thought I would put a little 'mantra' on my page in homage to the latest Fatboy Slim single. 

My Digital Studio is lots of fun and is easy to use. You can create digital scrapbook pages, cards, party favours, name tags, pennants, table settings....the sky is the limit. Just download it from the link above. 

My page today used the Amped Up Ampersands Digital Kit which is full of groovy ampersand images and background pages. 

Cheers
Alison xx

Happy Birthday Anne Marie Hile!

Happy Birthday Anne Marie Hile!!!!


**This card was inspired by a card by Catherine Pooler over at StampNation.

I hope this card gets to Texas in time for your birthday Anne Marie!

You are a 'one-of-a-kind' person....so supportive, encouraging and creative. It has been fantastic getting to know you over the inter-webs at Dynamic Duos. Love your work! xxx

Love
Alison xxx


Tuesday, November 12, 2013

Stampin' Up! Australia - Stampin' Up! Undefined Stamp Carving!

Hi

Yesss! The "Undefined" Stamp Carving Kit is finally in Australia!

What does this mean!?...

Have you ever wanted a stamp but couldn't find the perfect image? Maybe you have a special family logo or a sketch you would like to have as a stamp. Well now you CAN! Undefined is Stampin' Up!'s new stamp carving product line. You define the rubber stamp any way you want.

When you carve your very own stamp, you will have an entirely new and different creative experience. And when you're finished, you will have created a one-of-a-kind stamp!

Here's a video to show you what you can do....


Here's the codes you need...
133402 Undefined Stamp Carving Kit $34.95
134808 Undefined Refill Kit $16.95 (you'd better get one of these!)
124236 Clear-Mount Cling Foam* $18.95

*Add a sheet of Clear-Mount Cling Foam to create your own clear-mount stamps. Mounting your stamps on the cling foam allows you to make stamps any size you want, not just what will fit on the blocks in the kit.

Included in the Stamp Carving Kit:
2 carving tools
7.6 x 10.2 cm rubber
7.6 x 10.2 cm foam
4 wood blocks (various sizes)
1 Island Indigo Stampin' Write Marker
3 postcards
Instruction sheet
Stamp image templates

Included in the Refill Kit:
7.6 x 10.2 cm rubber
7.6 x 10.2 cm foam
4 wood blocks (various sizes)
Instruction sheet


Express your personality, thoughts, feelings, etc. with a stamp you've carved all on your own! I know you'll have a 'look what I made!' moment.

Stampin' Up! want to see what you make with your kit. Please e-mail Stampin' Up! a photo of your creations and any projects you make with your carved stamps to undefined@stampinup.com so Stampin' Up! can pin your photos to their Undefined Pinterest Board

You can order your kit at my online store or call me on 0413 405 139 or email me with your order. :)

Cheers
Alison xx

Monday, November 11, 2013

Stampin' Up! Australia - Color Coach Card #23 - Less is More - Baby Wipe Technique

Rich Razzleberry Card #2

Hi

I've neglected my Color Coach Challenge Journey somewhat, but I'm back on the wagon with this card. I wanted to play along with the One Layer Challenge at Less is More this week AND when I looked at the Color Coach colours of Rich Razzleberry, Old Olive and Pumpkin Pie....it said "Thanksgiving" to me.

Now....if you read my blog carefully you will figure out that I am in Australia where we do not celebrate 'Thanksgiving'....so why would I make a Thanksgiving card you may ask?.....well, I have a couple of very lovely and totally fantastic friends from the US....one of which lives in Brisbane and the other returned to Ohio a few months back, so I'm going to send them this card. I think 'Thanksgiving' is a wonderful tradition.....I wish that Australia had something similar....preferably in our Autumn! :)

Here's my One Layer Card....yes, it is definitely one layer...there's a couple of techniques going on here...Baby Wipe & Masking. 

Baby Wipe Technique:
I dropped ink from my reinkers onto a baby wipe that I just folded onto a saucer. I took my 'Four Seasons' stamp and used the baby wipe like an ink pad. It gives a lovely marbled effect and looks so much better in real life. :) I don't know why it took me so long to give this technique a try!

Masking:
Now I confess that the border was a 'mistake cover-up'! *GASP* 
Originally this was a plain white card and I felt that the border needed something so I drew some lines freehand around the border with my Rich Razzleberry and Old Olive markers. I wanted it to look like a beautiful doodled masterpiece but it just looked wrong. So I got a couple of post-it notes and stuck them down about 5mm from the border and sponged quite heavily around the edges with Rich Razzleberry. I drew a few more lines and lo and behold it looked like a wooden frame. Don't you love it when a mistake gives birth to a card that you didn't even imagine!?


Anyway....I hope my friends like their card....and Happy Thanksgiving to all my US blog followers and all my US Pinterest followers! :)

Cheers
Alison xx

Materials used:
Stamps - Four Seasons (retired), Day of Gratitude (retired)
Ink - Rich Razzleberry (inkpad, marker, reinker), Old Olive (inkpad, marker, reinker), Pumpkin Pie (reinker). 
Cardstock - Whisper White
Accessories - none!
Tools - Stampin' Trimmer, Baby Wipe, Stampin' Sponges. 


Sunday, November 10, 2013

Stampin' Up! Australia - Stampin' Up! Christmas Card

Hi

This is a more traditional style for me.....a few layers....the peep of a doily (thanks Catherine Pooler!)...some DSP and some ribbon.

My card uses the colours from Dynamic Duos and the sketch from Mojo Monday.


If you like this card and are inspired by it to make your own, then support my business & creativity and purchase your craft supplies at my online store. The 'tree' stamp on my card is now retired but the Special Seasons stamp set would be lovely I think as a substitute!

Thanks for visiting!

Cheers
Alison xx

Materials used
Stamp - Snow Swirled
Ink - Always Artichoke
Cardstock - Crumb Cake, Always Artichoke, Whisper White, Champagne Glimmer Paper
Accessories - Always Artichoke Seam Binding Ribbon, Twine, Paper Doily
Tools - Stampin' Trimmer, SNAIL, Big Shot, Stylish Stripes Textured Impressions Embossing Folder,  Merry Minis Punch Pack (star punch), Glue Dots, 1/2 circle punch, Crop-a-dile