Welcome to my blog!

Hi!

I invite you to please visit some of my blog posts below and have a look at the projects that I've created with the wonderful Stampin' Up! product range.

If you would like a current Stampin' Up! catalogue please email me!

Wednesday, April 16, 2014

CASE Study Design Team

Marina Mist Card #2

Hi

Here's a card from my my Color Coach Journey. This card uses Marina Mist, Old Olive and Real Red. 


I have used the sketch from Retrosketches this week to help me. There were lots of cool angles in their sketch and I haven't done a card that uses layered angles before. 

I am also entering this card into the CASE Study Design Team call. I haven't been on a Design Team for a while, and I do really miss the regular challenge to create something unusual and inspiring. CASE Study always have UNBELIEVABLE muses to inspire the team and participants.  

My personal muse is Catherine Pooler - she has such a fun and artistic style and is always pushing the boundaries of her creativity. She is never unafraid to try new things and I think that is the key to developing as a card designer. I am always in awe of the things that she does with paper, stamps and ink! 

She has shared a few angled cards on Stampnation, but I think this one on her blog  is my favourite. There's also a photo below my card :)

I was inspired by her gradient sponging, angles, and gold sequins. So cool! 


I got the effect on my card by sponging Marina Mist, Real Red and Old Olive onto a piece of Whisper White. The overlap of Real Red & Marina Mist produces a lovely purple colour and the overlap of Old Olive and Marina Mist gives a gorgeous deep teal.    
I hope you dig my card! :)

Cheers
Alison xx

Monday, April 14, 2014

Stampin' Up! Australia - Stampin' Up! Zoo Babies

Hi

I recently bought the Zoo Babies stamp set and couldn't wait to get it inked up and onto a card. :)

It is SO CUTE!

When I saw the colours from Pals Paper Arts and the sketch from CAS(E) This Sketch  , I knew that they would be perfect for my Zoo Babies! :)


My windows are recessed and were made using the smallest frame of the Squares Collection Framelits Dies.  I die cut it 9 times to get my windows and then I stamped onto the little squares. The squares were then stuck down onto my card base and the window panel was mounted with dimensionals (cut into tiny little strips), so that it floated on top of my stamped images. 

Confession time....I originally wanted this card to be beautiful and clean and white on the top, but after I finished my framelit cutting, I looked at my window piece and some dust must have settled onto my cutting plates and transferred marks onto my white card stock. Since it was late in the night, I didn't want to start all over again, so I just pulled out Gorgeous Grunge and stamped some 'splatter' over the top. 

Hope you like my card!

You can click on any of the links below to be taken to that product in my online store. :)

Cheers
Alison xx

Materials used:

Sunday, April 13, 2014

Stampin' Up! Australia - Spiral Flower Die - Golden Wedding Card

Hi

This card was inspired by the Mojo Monday's Sketch this week. As soon as I saw those 3 circles, I just knew that I would have to break out my new Spiral Flower Originals Die and make 3 roses.

Gold is very 'on trend' at the moment, so I thought I would use 4 gold elements on my card:

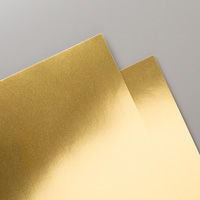
1.  Brushed Gold card stock for my flowers.
2.  Gold Foil for my leaves.
3.  Encore gold ink clear embossed for my chevron background.
4.  Gold embossing powder for my 'Congratulations' sentiment.


If you like the look of those flowers, then watch this tutorial - it's all about using the Spiral Flower Originals Die....super easy and SO effective. :)


If you like this card and would like to order the supplies, they are listed below...or simply just email me and I'd be happy to put together an order for you. :)

Cheers
Alison xx


Materials used:


Stampin' Up! Australia - Hip Hip Hooray - I'm using scraps!

Hi

This week, I made mention in an online forum that I would be grateful for ideas for new ways to use up my scraps....

I decided to take matters into my own hands and I threw together a card late last night with some stuff that had been laying around in various parts of my craft space.

What do you think?


I'll talk you through it...

1. The main sentiment panel was a practice panel from this card - there wasn't anything wrong with it, so I'm not quite sure why I didn't use it. It went into my scraps pile. 

2. The Melon Mambo layer was a left-over piece from a spares pack that I took to a previous card class.

3.  The banners - I keep a little jar with small square and rectangular pieces of coloured card stock and DSP in it....these little pieces were perfect for my banner and for my flower.

4. The Silver Glimmer Paper layer was actually a scrap piece....rather than being a large plain piece - it has a few shapes cut from the middle of it....a couple of snowflakes, some stars....but the rectangular piece itself had a border that was still intact....so I used that and layered my melon mambo piece onto it. 

GOTHDOVE TIP! I have been doing this for a while when I punch out or die cut....but I finally got some photos to demonstrate. I cut the main piece into a standard layer piece, then punch card stock from the middle parts ensuring that I retain a decent border intact. That way, you will never have any wastage! :)

Here's something to pin for later....


Let me know what you think of this tip. :)

Give it a try! :)

Cheers
Alison xx


Materials used: